实验目的
让VLAN10、30内的主机能够访问外网,Server1拥有一个公网IP,以便外网主机能够直接访问Server1
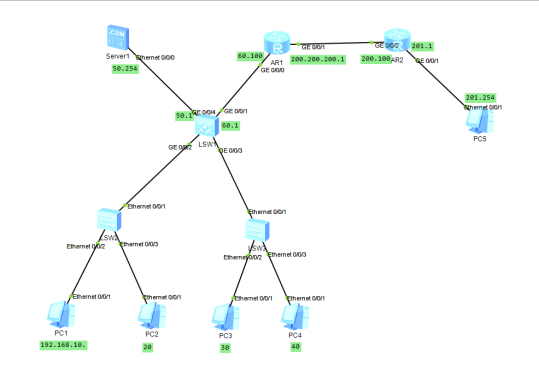
拓扑:
配置
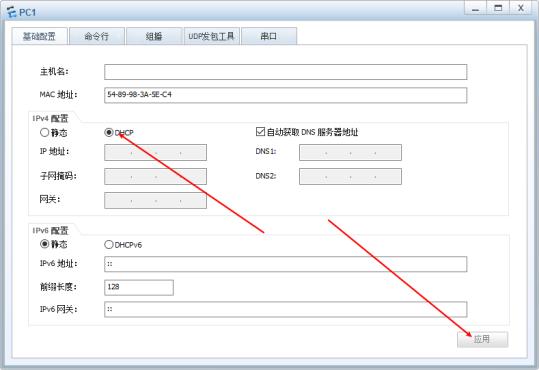
PC
开启DHCP,点应用
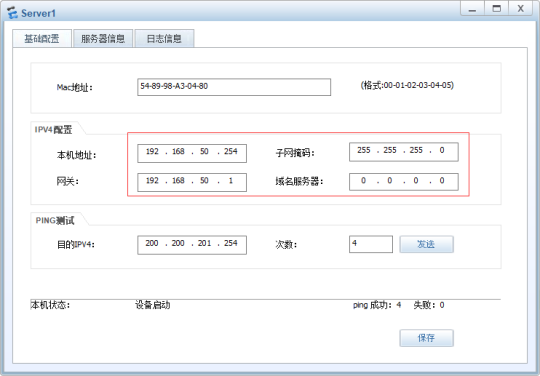
Server1
配置静态私网IP,方便转换公网
S2:
<Huawei>sys
Enter system view, return user view with Ctrl+Z.
[Huawei]un in en
Info: Information center is disabled.
[Huawei]sys LSW2
[LSW2]vlan 10
[LSW2-vlan10]vlan 20
[LSW2-vlan20]quit
[LSW2]int e0/0/1
[LSW2-Ethernet0/0/1]port link-t t
[LSW2-Ethernet0/0/1]port t allow vlan all
[LSW2-Ethernet0/0/1]int e0/0/2
[LSW2-Ethernet0/0/2]port link-t a
[LSW2-Ethernet0/0/2]port de vlan 10
[LSW2-Ethernet0/0/2]int e0/0/3
[LSW2-Ethernet0/0/3]port link-t a
[LSW2-Ethernet0/0/3]port de vlan 20
[LSW2-Ethernet0/0/3]quit
[LSW2]qu
<LSW2>save
The current configuration will be written to the device.
Are you sure to continue?[Y/N]y
Info: Please input the file name ( *.cfg, *.zip ) [vrpcfg.zip]:
Now saving the current configuration to the slot 0.
Save the configuration successfully.
S3:
<Huawei>sys
Enter system view, return user view with Ctrl+Z.
[Huawei]un in en
Info: Information center is disabled.
[Huawei]sys LWS3
[LWS3]vlan 30
[LWS3-vlan30]vlan 40
[LWS3-vlan40]quit
[LWS3]int e0/0/2
[LWS3-Ethernet0/0/2]port link-t a
[LWS3-Ethernet0/0/2]port de vlan 30
[LWS3-Ethernet0/0/2]int e0/0/3
[LWS3-Ethernet0/0/3]port link-t a
[LWS3-Ethernet0/0/3]port de vlan 40
[LWS3-Ethernet0/0/3]int e0/0/1
[LWS3-Ethernet0/0/1]port link-t t
[LWS3-Ethernet0/0/1]port t allow vlan all
[LWS3-Ethernet0/0/1]quit
[LWS3]quit
<LWS3>save
The current configuration will be written to the device.
Are you sure to continue?[Y/N]y
Info: Please input the file name ( *.cfg, *.zip ) [vrpcfg.zip]:
Now saving the current configuration to the slot 0.
Save the configuration successfully.
S1
<Huawei>sys
Enter system view, return user view with Ctrl+Z.
[Huawei]un in en
Info: Information center is disabled.
[Huawei]sys LWS1
[LWS1]vlan 10
[LWS1-vlan10]vlan 20
[LWS1-vlan20]vlan 30
[LWS1-vlan30]vlan 40
[LWS1-vlan40]vlan 50
[LWS1-vlan50]vlan 60
[LWS1-vlan60]quit
[LWS1]int g0/0/2
[LWS1-GigabitEthernet0/0/2]port link-t
[LWS1-port-group-link-t]quit
[LWS1]int g0/0/2
[LWS1-GigabitEthernet0/0/2]port link-t t
[LWS1-GigabitEthernet0/0/2]port t allow vlan all
[LWS1-GigabitEthernet0/0/2]int g0/0/3
[LWS1-GigabitEthernet0/0/3]port link-t t
[LWS1-GigabitEthernet0/0/3]port t allow vlan all
[LWS1-GigabitEthernet0/0/3]int g0/0/4
[LWS1-GigabitEthernet0/0/4]port link-t a
 [LWS1-GigabitEthernet0/0/4]port de vlan 50
[LWS1-GigabitEthernet0/0/4]int g0/0/1
[LWS1-GigabitEthernet0/0/1]port link-t a
 [LWS1-GigabitEthernet0/0/1]port de vlan 60
[LWS1-GigabitEthernet0/0/1]quit
[LWS1]dhcp en
Info: The operation may take a few seconds. Please wait for a moment.done.
[LWS1]ip pool vlan10
Info:It's successful to create an IP address pool.
[LWS1-ip-pool-vlan10]gateway-list 192.168.10.1
[LWS1-ip-pool-vlan10]net 192.168.10.0 mask 255.255.255.0
[LWS1-ip-pool-vlan10]qu
[LWS1]ip pool vlan20
Info:It's successful to create an IP address pool.
[LWS1-ip-pool-vlan20]gateway-list 192.168.20.1
[LWS1-ip-pool-vlan20]net 192.168.20.0 mask 255.255.255.0
[LWS1-ip-pool-vlan20]qu
[LWS1]ip pool vlan30
Info:It's successful to create an IP address pool.
[LWS1-ip-pool-vlan30]gateway-list 192.168.30.1
[LWS1-ip-pool-vlan30]net 192.168.30.0 mask 255.255.255.0
[LWS1-ip-pool-vlan30]qu
[LWS1]ip pool vlan40
Info:It's successful to create an IP address pool.
[LWS1-ip-pool-vlan40]gateway-list 192.168.40.1
[LWS1-ip-pool-vlan40]net 192.168.40.0 mask 255.255.255.0
[LWS1-ip-pool-vlan40]quit
[LWS1]int vlan 10
[LWS1-Vlanif10]ip add 192.168.10.1 24
[LWS1-Vlanif10]dhcp select global
[LWS1-Vlanif10]int vlan 20
[LWS1-Vlanif20]ip add 192.168.20.1 24
[LWS1-Vlanif20]dhcp select global
[LWS1-Vlanif20]int vlan 30
[LWS1-Vlanif30]ip add 192.168.30.1 24
[LWS1-Vlanif30]dhcp select global
[LWS1-Vlanif30]int vlan 40
[LWS1-Vlanif40]ip add 192.168.40.1 24
[LWS1-Vlanif40]dhcp select global
[LWS1-Vlanif40]quit
[LWS1]int vlan 50
[LWS1-Vlanif50]ip add 192.168.50.1 24
[LWS1-Vlanif50]in vlan 60
[LWS1-Vlanif60]ip add 192.168.60.1 24
[LWS1-Vlanif60]quit
[LWS1]qu
<LWS1>save
The current configuration will be written to the device.
Are you sure to continue?[Y/N]y
Info: Please input the file name ( *.cfg, *.zip ) [vrpcfg.zip]:
Now saving the current configuration to the slot 0.
Save the configuration successfully.
[LWS1]ip route-static 0.0.0.0 0.0.0.0 192.168.60.100
R2:
<Huawei>sys
Enter system view, return user view with Ctrl+Z.
[Huawei]un in en
Info: Information center is disabled.
[Huawei]sys LWR2
[LWR2]int g0/0/0
[LWR2-GigabitEthernet0/0/0]ip add 200.200.200.100 24
 [LWR2-GigabitEthernet0/0/0]int g0/0/1
[LWR2-GigabitEthernet0/0/1]ip add 200.200.201.1 24
[LWR2-GigabitEthernet0/0/1]quit
[LWR2]quit
<LWR2>save
  The current configuration will be written to the device.
  Are you sure to continue? (y/n)[n]:y
  It will take several minutes to save configuration file, please wait.......
  Configuration file had been saved successfully
  Note: The configuration file will take effect after being activated

R1:
<Huawei>sys
Enter system view, return user view with Ctrl+Z.
[Huawei]un in en
Info: Information center is disabled.
[Huawei]sys LWR1
[LWR1]int g0/0/0
[LWR1-GigabitEthernet0/0/0]un sh
Info: Interface GigabitEthernet0/0/0 is not shutdown.
[LWR1-GigabitEthernet0/0/0]ip add 192.168.60.100 24
[LWR1-GigabitEthernet0/0/0]int g0/0/1
[LWR1-GigabitEthernet0/0/1]ip add 200.200.200.1 24
[LWR1-GigabitEthernet0/0/1]quit
[LWR1]ip route-static 192.168.0.0 255.255.0.0 192.168.60.1
[LWR1]ip route-static 200.200.0.0 255.255.0.0 200.200.200.100
[LWR1]acl number 2000
[LWR1-acl-basic-2000]rule 0 per source 192.168.10.0 0.0.0.255
[LWR1-acl-basic-2000]rule 5 per source 192.168.30.0 0.0.0.255
[LWR1-acl-basic-2000]rule 10 per source 192.168.50.0 0.0.0.255
[LWR1-acl-basic-2000]quit
[LWR1]int g0/0/1
[LWR1-GigabitEthernet0/0/1]nat outbound 2000
[LWR1-GigabitEthernet0/0/1]nat static global 200.200.200.10 inside 192.168.50.254
[LWR1-GigabitEthernet0/0/1]quit
[LWR1]quit
<LWR1>save
  The current configuration will be written to the device.
  Are you sure to continue? (y/n)[n]:y
  It will take several minutes to save configuration file, please wait..........
....
  Configuration file had been saved successfully
  Note: The configuration file will take effect after being activated
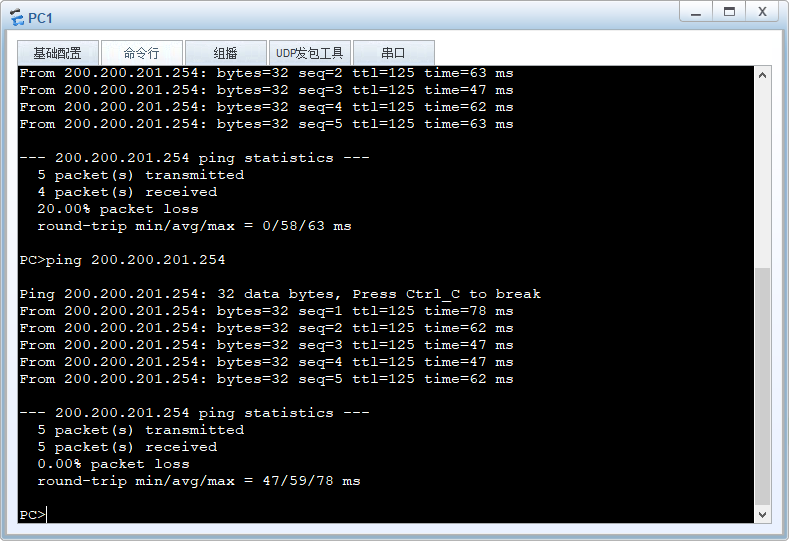
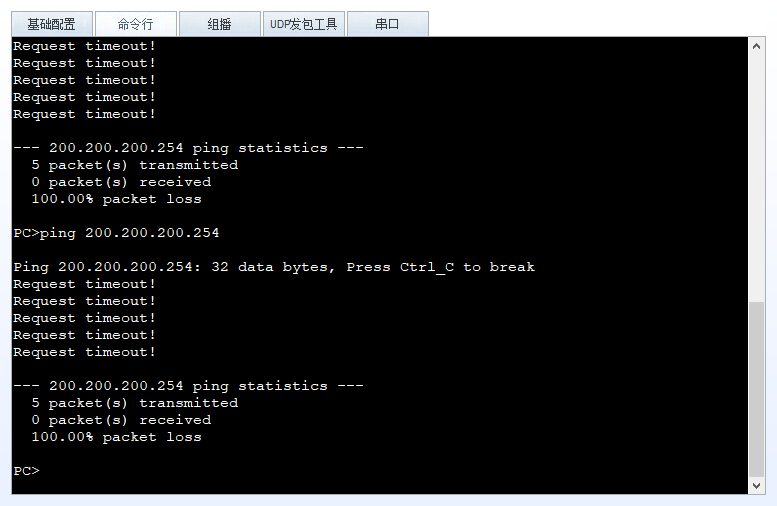
测试
PC1、PC2、服务器分别pingPC5

文章汇总:
go->
go->
go->
go->
go->
go->
go->
go->
go->
go->